Natural Yeast Artisan Bread - Family warmth and closeness could be obtained in easy ways. A single of them is cooking and serving meals for the loved ones. As a housewife, not surprisingly you do not need to miss a meal collectively ideal? Cuisine also can be the key to a happy family, numerous really feel homesick mainly because their cooking has been discovered elsewhere.
So for all those of you who prefer to cook and like it or not you may have to provide meals for the family members, obviously you also never want the exact same dishes, ideal? It is possible to cook with new and basic variants. Mainly because now you can easily find recipes without the need of possessing to bother. Like the following Natural Yeast Artisan Bread which you'll be able to imitate to be presented for your beloved household.
Deals That Are Lower Than Low. Baker's® Is Working Around The Clock To Ensure In Store Items Are Available. Fill Your Cart With Color Today!
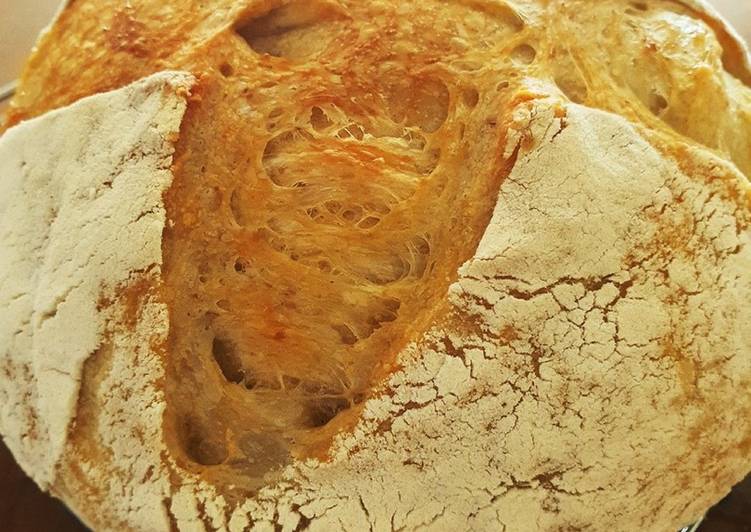
Natural Yeast Artisan Bread is one of the most favored of current trending meals in the world. It's simple, it's quick, it tastes yummy. It's appreciated by millions every day. They're fine and they look wonderful. Natural Yeast Artisan Bread is something which I have loved my whole life.
To get started with this recipe, we must prepare a few components. You can have natural yeast artisan bread using 5 ingredients and 10 steps. Here is how you can achieve it.
Composition needed to cook Natural Yeast Artisan Bread:
- 250 g bread flour
- 50 g wholemeal flour
- 8 g salt
- 210 ml water
- 80 g natural yeast starter (apples, grapes, etc.)
All-purpose flour, sea salt, yeast and sugar are the only ingredients you need. I use Sherpa Pink Himalayan Salt in my kitchen. The other products I use are King Arthur Flour, Active Dry Yeast and Natural Cane Sugar. Why do I need sugar in my Bread Recipe?
Directions to make Natural Yeast Artisan Bread:
- Combine the bread flour and the wholemeal flour first in a bowl/container, then add the water. Mix, cover, and let rest for 30 minutes. This is known as the autolyse method.
- Once the mixture has rested for 30 minutes, combine the salt first, mix slightly and then add the natural yeast starter. Using the four-fold technique, ‘fold’ the dough in itself four times before turning the dough over and slightly rounding it. Then, cover and let rest at room temperature for 30 minutes. Repeat this process 3 times.
- For the final repetition, instead of letting the dough rest for another 30 minutes, put the dough in the fridge overnight.
- Next, take the dough out of the fridge and let the dough proof at room temperature (25℃~30℃) for about 7~8 hours, or until doubled in size.
- After the dough has proofed, take the dough out onto a work surface without flipping it over (keep the top of the dough facing up).
- Fold the dough in itself using the four-fold technique one last time. After the fourth fold, use your index finger and thumb to pinch the seam of the dough shut. Then, let the dough bench proof (about 15 minutes).
- After letting the dough bench proof, place a dry cloth on top of a bowl and generously sprinkle flour on it. Then, flour the top of the dough and flip the dough (top side facing down) into the bowl. Flour the dough again before folding the cloth over it and covering with a plastic bag. Let it rest at room temperature for 45 minutes.
- After 30 minutes, line a baking tray with parchment paper and preheat the oven to 250℃ for 15 minutes.
- After 45 minutes, transfer the dough into the baking tray by flipping it over and score the top of the dough in an ‘X’ shape. Spray the dough with a bit of water.
- Finally, bake the bread at 200℃ for 10 minutes, and then at 230℃ for 20 minutes.
I wanted to make my favorite milky bread with homemade natural yeast. There is evidence natural yeast can help combat these problems. There have been many instances noted where people have been able to finally enjoy bread again without having a diabetic spike, allergic reaction, or heartburn - all because they switched to bread made with natural yeast. If using ceramic or glass, you will need to line with parchment paper as natural yeast will dissolve any non-stick spray on the sides of the glass pans (this isn't an issue for in-stock metal pans). Unlike all of my other yeast bread recipes, this gluten free artisan bread does not have to be made in a stand mixer.
So that's going to wrap it up for this exceptional food natural yeast artisan bread recipe. Thank you very much for reading. I am confident that you can make this at home. There is gonna be interesting food in home recipes coming up. Remember to save this page on your browser, and share it to your loved ones, friends and colleague. Thanks again for reading. Go on get cooking!